Vegan ‘Cheesy’ Almond, Leek & Herb Sausages

28064800_UnknownMany years ago, Delia Smith’s cookery books became our bible and a particular family favourite was and remains her vegetarian Cheesy Herb Sausages. My husband makes them every week. Our daughter-in-law was introduced to them when she joined our family and now makes a personal request for them when she comes to visit.

Since becoming vegan and gluten-free, however, I’ve had to forego this pleasure and usually have a bought alternative (I like Dee’s Wholefoods) when family come to stay and choose something else when it’s just us.

When I was still vegetarian, but had to become gluten-free, my husband offered several times to make an alternative with gluten-free bread, but commercial g/f bread has an aftertaste that dominates whatever you use it in and I never wanted to use up the homemade bread for this as it is time-consuming for him to make (I can’t do it because of my back injury) and I also didn’t want him to have to make two lots of different sausages.

Now that I am vegan and he has also given up eggs (but not cheese yet, we are getting there slowly), and we are more used to vegan cooking, we decided to try making some Delia-lite sausages using a chia egg and nutritional yeast. It was surprisingly easy and came together quickly. Chia egg is quite a miracle worker when it comes to needing a binding agent to replace real eggs in burgers and sausages.

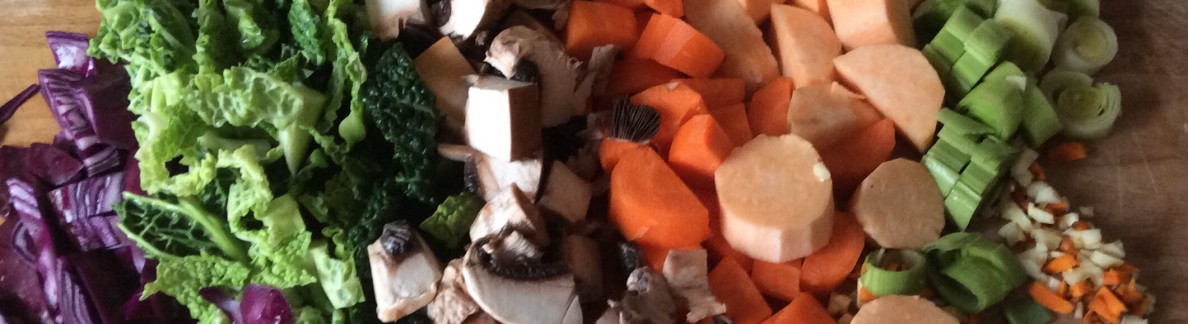
I chose leek rather than onion for several reasons: I find onion difficult to digest; onion, unless you grate it, often doesn’t cook properly in homemade sausages while leek doesn’t dominate and also blends with the mixture better, it holds together well.

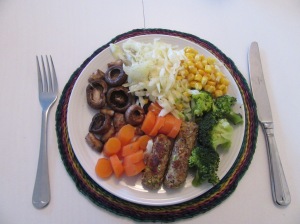
These are our first attempt and we were very pleased with them. They are firm, tasty and satisfying.

Watch out for our second version:  Vegan Leek, Carrot and Ginger Sausages, even better!

Makes about 8 depending on size.

Vegan, Gluten-free and Organic where possible.

Ingredients

2.5 oz / A third of a Cup Almonds, soaked,  rinsed and patted dry, then roughly grind with:

2 Heaped Tbsps Nutritional Yeast

1 Tsp Dry Mustard

1 Tsp Thyme

1 Tsp Sage

Add together in a processor with:

5 oz/ Gluten-free Breadcrumbs*

Pink Himalayan Salt & Black Pepper to taste

1 Small Leek, finely chopped

1 Tbsp Sesame Seeds

A Splash of Tamari

1 Chia Egg (1 Tbsp Chia Seeds soaked in 3 Tbsps Water to form a gel)

Process all the ingredients for a few seconds until the mixture will stick together but still has some texture, squeeze into sausage shapes.

28064768_Unknown

Refrigerate for a while until needed.

Lightly cook in coconut oil, turning frequently (the sausages, that is, but  you can do a twirl now and then if you like while you’re waiting!).

We put some uncooked ones in the freezer for another day.

*Vegan Gluten-Free Tiger Nut Loaf/Bread Mk III

Copyright: Chris McGowan

Spiced Chickpeas & Veggies with Brown Basmati Rice & Wilted Spinach

img_3213As often happens, this came about as my alternative to a meal my husband was having which had potatoes and tomato sauce in (his favourite items to cook with). I avoid nightshade foods* because they are reputed to increase inflammation in people who have auto-immune conditions like psoriasis or arthritis.

It was the day Storm Doris hit and Hb had been out in it all afternoon, delivering our local free mag, while clinging on to fences as he went along in order to stay upright! He was chilled to the bone when he returned home and so decided to have a hot bath and then some vegetable curry out of the freezer.

I devised this version for myself and we shared the rice and steamed green vegetables. It is quick and easy to make.

The spices were heated in a little coconut oil, the veggies were chopped up finely, added to the spices and sweated for a few minutes, then a little vegetable stock was added and it was all cooked for about 20 minutes before adding the chickpeas. Meanwhile, the soaked and rinsed brown basmati rice was cooking alongside and just before serving we put some sugar snap peas in the steamer, after a couple of minutes 2 handfuls of washed spinach followed for just long enough to wilt slightly. This shouldn’t be overdone as it will carry on wilting on the plate.

Spinach is one of those vegetables that is better lightly cooked than raw (as are broccoli, tomatoes and carrots) in terms of making the nutrients more bioavailable, in this case the iron content.

The chickpeas are also a good source of iron and calcium. 

Plenty of B vitamins in this meal, too, along with protein, potassium, antioxidants, dietary fibre and so much more!

Vegan, Gluten-free, Organic where possible.

Ingredients

Enough for 2 servings

img_3206

1 Tsp Coconut Oil for cooking

A little Fresh Ginger, chopped finely

A little Fresh Turmeric, chopped finely

1 Tsp Cumin Seeds

Large Handful Chopped Carrot

Large Handful Chopped Broccoli

2 Chestnut Mushrooms, chopped

Leek, chopped

Small Chioggia Beetroot, chopped

A little Vegetable Stock, below the level of the veggies in the pan

Squeeze of Tomato Purée

Black Pepper

Twist of Pink Himalayan Salt

Lightly Toasted Pine Kernels for garnish

Add the ingredients to the hot but not smoking oil in the above order, stir about then reduce the heat, put on the lid and sweat for about 10 minutes. Stir once or twice.

Meanwhile, cook 1 Cup soaked and rinsed brown Basmati rice in 1 1/2 Cups Boiling Water on a low heat with the lid on until just done and the water absorbed, with the grains still separate, about 20 minutes.

img_3207Add the remainder of the ingredients (except the pine kernels) to the sauce, replace the lid and cook until just done but not mushy.

Blend the sauce a little with a stick blender to thicken it a bit but so that you can still see some shape and colour.

Stir in the chickpeas and replace the lid to warm through.

img_3208

When ready to serve, add some sugar snap peas to a steamer for a couple of minutes, then the spinach for a minute.

Serve in a large, hot bowl, sprinkle with lightly toasted pine kernels.

img_3212

Copyright: Chris McGowan

Midweek Vegan Bean & Vegetable Pasta

img_3157

A quick and easy midweek staple, I can’t really give accurate measurements, or even precise ingredients, as it depends who’s having it and what we have in, but these are the basic steps:

Veggies (organic where possible, washed and unpeeled): This time we used celery, carrot, chestnut mushrooms, peas, broccoli, courgette, all chopped up small (I used to start off with onion and garlic, but have omitted them from my diet this past few months to see if it helps with digestive issues, it does), we also use green beans when in season and leeks.

Add black pepper

Sweat them in some coconut oil for a few minutes

Add a little vegetable stock, some herbs, tamari, tomato purée if not avoiding nightshades (I push the boat out occasionally with a little tomato now and then but I can’t tolerate tinned tomatoes made into a sauce).

Cook on a low heat, with a lid on

Add half a can of organic mixed beans at the end to warm through (we alternate between beans and lentils)

Check seasoning

If you want to thicken it a little, use a stick blender or mix in some nutritional yeast

Cook pasta of your choice, we used Doves Farm Gluten-free Fusilli.

Arrange pasta in a pasta bowl, pour over sauce, mix in some nutritional yeast for B vitamins, protein and a cheesy flavour, top with fresh basil leaves and baby tomatoes.

Makes enough for 2, with a green salad.

(See also Lemon Tahini Pasta with Pine Kernels)

Chris McGowan

Raw Carrot Cake Bites with CoYo Frosting – So Moreish!

img_3253I saw these on Instagram and had to try them! Before I became vegan and gluten-free, the only cake I really liked was carrot cake. This raw version from Charley’s Health comes pretty close and were perfect for our family visit with the littles.

I made some small adjustments: I used walnuts instead of pecans (I’m sure you can use seeds if you need to avoid nuts) and used half as much maple syrup in the frosting and they were perfect. Just sweet enough. I also used a little squeeze of fresh orange juice as well as the zest as the mixture was a little dry to manipulate – our medjool dates were quite hard so they were soaked in a little orange juice while everything else was prepared. I also used plain yogurt with a few drops of vanilla extract added as we couldn’t find vanilla yogurt. You could add a few drops of fresh orange juice instead.

The only thing I would point out is that this recipe makes a small amount, the slices are bite-sized – you wouldn’t want to eat more than a couple, they are very satisfying, but if you have visitors you would probably want to double the recipe.

There is no refined sugar, they are vegan and gluten-free. The base is done in the food processor and then frozen before mixing the yogurt and maple syrup for the frosting.

We made the base the day before and put in the freezer, the frosting was made next morning just before our little munchkins arrived. They keep well in the freezer (the slices, not the munchkins!).

As always, measurements are approximate and you may need to adjust to your own tastes and equipment.

Excuse the awful photos, there was no natural light – the sky was getting ready to send down a deluge – and I had to take them quickly before they were scavenged!

Copyright: Chris McGowan

Spicy Chickpea & Coriander Veggie Burgers (vegan & gluten-free)

img_3236We don’t like to throw away our almond milk pulp and didn’t really want another batch of bliss balls, despite the impending visit of the little grandchildren at the weekend (there were other treats awaiting them), so we made burgers as there were none left in the freezer. (You can substitute the almond pulp, see below)

These were the best of our burger experiments in terms of holding together easily, they were no problem at all to form into patties.

These burgers are full of essential nutrients, including protein, iron, omega fats, b vitamins, calcium, antioxidants.

Vegan, Gluten-free, Organic where possible.

Makes about 6-8, depending on size.

All measurements are very approximate.

Ingredients

1 Cup Chickpeas, drained & rinsed, left to dry out a little

1 Chia Egg (1 Tbsp Chia Seeds soaked in 3 Tbsps Water to form a gel)

1 Cup Almond Milk Pulp (or use a substitute, eg ground almond or other nuts, ground sunflower seeds, you may need to adjust the liquid required).

1 Very Small Onion, finely chopped

Crushed Garlic,  if liked

3/4 Cup Coarsely Grated Carrot

1/4 Cup Chopped Sweet Apricot Kernels (or Almonds or other nuts/seeds)

1/2 Tsp Vegetable Bouillon Powder

1/2 – 1 Tsp Ground Ginger

1/2 Tsp Ground Turmeric

1 Tsp Cumin Seeds

Good Splash of Tamari

Squeeze of Tomato Purée

1/2 Tbsp Coconut Oil, melted

Chopped Fresh Coriander

Black Pepper

Twist of Pink Himalayan Salt

Extra coconut oil for cooking.

Method

Process all ingredients until it will come together when you press it.

img_3225Using small handfuls, gently press and shape into rounds in the palm of your hands and then flatten on a board.

Refrigerate to firm them up.

(We had sun streaming through the kitchen window, trying to make amends I think after Storm Doris had blown herself out!)

Fry in a little coconut oil or bake in the oven on an oiled tray.

img_3230

We served them with a mixed salad, tamari-flavoured toasted pumpkin and sunflower seeds, and I had mushrooms and sweetcorn whilst my husband had jacket potato and cheese.

img_3232

Copyright: Chris McGowan

Vegan, Gluten-Free Plum Crumble – Nice, But Not Too Naughty!

You may remember in my previous post I was asked what I ate if I couldn’t have anything ‘naughty’ (see here). Well, that day, our neighbour gave us some plums from his garden and as our teenage friend was coming to visit again the next day – this time with his dad and dad’s partner – we decided to make a huge plum crumble. If you read the earlier post, you’ll understand why it had to be huge: teenage boy/growing/neverstopseating!

Here’s the recipe: no refined sugar, just a little maple syrup and a lot of natural flavour! Unfortunately, we didn’t weigh the plums, there were enough to fill a supermarket ice-cream box.

The topping can also be used for an apple or any other fruit crumble.

Ingredients

(Organic where possible, all quantities are approximate)

Plums, washed, stoned and cut in half

Cinnamon to taste

1 Tbsp Maple Syrup

A Few Tbsps of Apple Juice, but don’t drown them

image

Topping

4 oz Gluten-Free Oats – if you prefer a finer texture, grind the oats and buckwheat flakes into flour

2 oz Buckwheat Flakes

2 oz Almonds, finely ground

(You could replace the almonds with desiccated coconut for an alternative flavour)

Approx. 2 oz Raw Virgin Coconut Oil, gently melted over warm water

1-2 Tbsps Maple Syrup

If you want a little more sweetness, you could add a small handful of raisins, either to the plum base or to the crumble topping.

Method

Place the plums cut side up in an ovenproof dish

Add Apple Juice

Sprinkle with Cinnamon

Add Maple Syrup

To make the topping:

Place all the dry ingredients in a large bowl and mix together

Stir in the coconut oil and maple syrup (and raisins if using)

Mix together well with a round-bladed knife and then through your fingers to create the crumble effect

Cover the plums

image

Place dish in oven at 170C for a Fan oven for about 40-45 minutes. Keep your eye on it, it needs to be golden, not dark brown!

Serve hot or cold with custard or plain yogurt, or Nana Rhys Cream with Mango, Cacao & Peanut Butter – the men had custard, I had CoYo plain coconut yogurt. I think it’s even better the next day when the crumble has soaked up some of plum juice.

image.jpeg

Makes enough for about 6 or 7 servings.

Our teenage friend gave it the thumbs up and had his two servings as per normal!

Copyright: Chris McGowan

Vegan Gluten-Free Tiger Nut Bread Mark ll

imageAnyone who is gluten-free for whatever reason will know how difficult it is to find a commercial gluten-free loaf that doesn’t look and taste like cardboard and is, if you’re lucky, only ‘good’ for toasting. It lasts a day and then breaks up. It has no flavour other than of additives, and no texture – and if you look at the list of ingredients, you may as well be reading a chemistry experiment!

We have several family members who are gluten-free and have made many variations of gluten-free loaves over the years. We find the ones made in the breadmaker are best, but it’s a bit hit and miss. One day it will come out perfect, the next the paddle will refuse to come out and you have a big hole in the middle or the bottom inch of the loaf isn’t cooked properly.

So, I am ever on the hunt for new recipes to try. This is our latest attempt based on a recipe I found by Dan Lepard on BBC Food. The first one we made, we used all tiger nut flour* as we didn’t have cornflour and it gave a lovely brown colour and lots of texture, but I think there was too much liquid: it spread too much and was very crusty.


So this is our second attempt and we kept a little closer to the original, although we didn’t have enough cornflour or enough tiger nut flour for the whole loaf, so we included some organic chickpea flour and a smaller amount of tiger nut flour this time. (You might also want to check out Version III and  Mk IV – the best yet!). 

Chickpea flour – also known as garbanzo bean flour and besan flour – is high in protein and has lots of vitamins and minerals including calcium – as does Tiger Nut flour, which is naturally sweet and high in dietary fibre.

 We were very pleased with it. You can’t really make traditional large sandwiches – it doesn’t rise a lot – but I had open sandwiches with tahini, lettuce, spring onion and olives and they were very moreish!

image

 We used plain coconut yogurt in place of dairy to make it vegan, and we also reduced the amount of liquid a little.

All measurements are approximate, you may need a couple of attempts to find the right combinations for you.

 Ingredients

25g – 50g (10z – 1 3/4 oz) Organic Golden Linseeds

450 mls (16 fl oz) Warm Water

2 1/2 Tsps Quick-acting Yeast

80 mls (3 fl oz) Plain Coconut Yogurt (or soya yogurt)

11 oz  (312g) Organic Cornflour/ Fine Maize Flour

4 oz (114 g) Organic Chickpea Flour

1 oz (30g) Tiger Nut Flour

1 Tsp Pink Himalayan Salt

1 1/2 Tsps Organic Coconut Palm Sugar

50g (1 3/4oz) Organic Psyllium Husk Powder

50 mls (1 3/4 Fl oz) Organic Raw Virgin Olive Oil

A little extra olive oil and flour

 Method

 Heat the oven to 180C/350F/gas 4

Warm the linseeds on a tray for about 10-12 minutes, until they darken slightly (the toasted seeds will release a sticky gluten-like substance when mixed with the wet ingredients, and they give the loaf a wheatgerm-like flavour).

Switch off the oven.

Mix together the water and yeast, then stir in the yogurt and seeds. Set aside.

Sift and mix together the flour, salt, sugar and psyllium husk powder  in a large bowl.

Pour in the yeast mixture and olive oil and mix well. Don’t worry if it looks like there’s too much liquid. It will turn into a sticky dough within a few minutes as the linseed, flour and psyllium husk powder become gel-like.

Once the mixture is firm enough, knead it for 10 seconds on the worktop to mix everything again, then place the dough back in the bowl, cover and leave in a warm but not hot place for 30 minutes.

Line a tray with non-stick baking paper.

Shape the dough into a ‘bloomer’ shape, ie long and thick, then brush with the extra olive oil, cover and leave it to rise for about 30 minutes.

Heat the oven to 240C/465F/Gas 9 (we have a fan oven and adjusted to 200C).

Make some diagonal cuts across the dough with a sharp knife, sprinkle with a little cornflour and bake for about 40 minutes, or until rich golden-brown in colour.

Cool on a wire rack before slicing.

*

image

Serving suggestions: Peanut butter and banana

image

Sliced avocado sprinkled with lemon juice and black pepper on bread with rocket, watercress and cucumber salad.

http://www.bbc.co.uk/food/recipes/gluten-free_olive_oil_42050

*The Tiger Nut Company

Copyright: Chris McGowan