After making Tiger Nut Milk, there is always a lot of dry pulp left over and it is such a shame to just discard it, so I came up with these easy-to-make and nutritious raw treats.
(See recipe for Tiger Nut Milk here, but you could also use almond milk pulp or sweet apricot kernel pulp which would give a slightly different flavour).
They are tarty because they are made using golden berries* which have a sweet/tart flavour, giving these treats a sharp citrus taste, and ‘tarty’ because they are over-made-up with cinnamon-flavoured raw cacao powder!
Before beginning, it is a good idea to slightly moisten, ever so lightly, the goji berries, with water or fruit juice, as they can be reluctant to blend when processed and you can get little bits of hard berry in the mix.
Today’s accompanying music video is the very funny Mika and ‘We Are Golden’ – Golden Berries, get it? 😉
Ingredients
1 Cup Tiger Nut Pulp
1/2 Cup Raisins
1/2 Cup Mixed Goji Berries and Golden Berries in a ratio of 2:1
1 Tsp Coconut Oil or Cacao Butter*
Raw Cacao Powder mixed with sprinkling of Cinnamon for dusting
Method
Process all ingredients except Cacao Powder until it is blended enough to stick together when pressed.
Squeeze together and shape into balls. It probably won’t roll, but will press into shape.
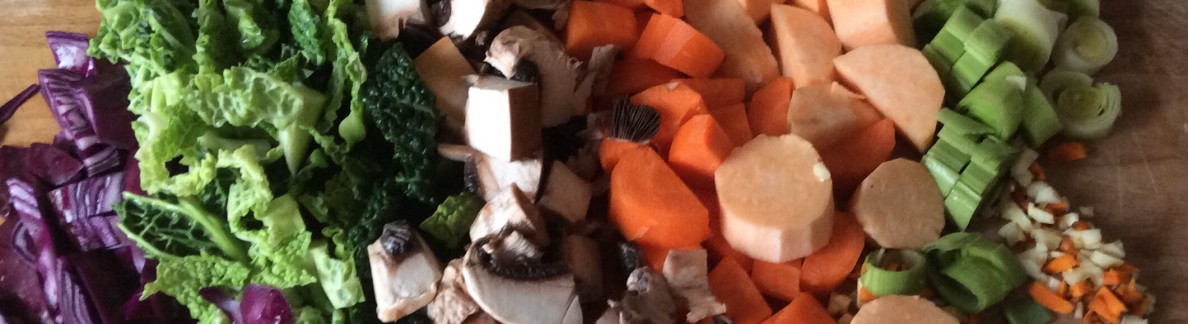
This is one of those meals where it was a case of just tossing together whatever was available with no thoughts of creating a new recipe for the blog, but it turned out so well I decided to post it anyway. It looks a bit like a bird’s nest, but satisfying and tasty.
These are our favourite kinds of meals: easy, quick, one chopping board, a sharp knife, spatula and frying pan. Little mess and lots of nutrients.
Prepare all your ingredients beforehand, have your seasonings ready and plate warming, because it all comes together very quickly.
This recipe is for 1 serving, amounts and timings are approximate.
Ingredients are organic where possible. For a little more colour you could add spiralised or shaved carrot. I am sensitive to nightshade foods, so I haven’t included bell peppers.
Ingredients
1 Tsp Raw VirginCoconut Oil
1 Small Onion, sliced or several Spring Onions, chopped
2 Cloves Garlic, minced
2 Thin Slices of Fresh Ginger, minced or chopped very finely
6 Sugar Snap Peas, topped, tailed and chopped
Half a Stick of Celery
4 Large Chinese Leaves, including stalks, chopped
1/4 Large Courgette, spiralised
Handful of Cashew Pieces
Half an Avocado, chopped
Handful Green Lentil Sprouts (or any other sprouted beans)
Handful Alflalfa Sprouts
Few splashes of Tamari
Freshly Ground Black Pepper
(I haven’t included salt as the Tamari is quite salty anyway)
Method
Melt Coconut oil in Large Frying Pan until a piece of onion starts sizzling, but not smoking
Add onion, garlic and ginger and stir-fry for a couple of minutes
Add Celery and Sugar Snap Peas, keep stir-frying for a further couple of minutes until the onion starts becoming translucent but not soft or brown
Add Cashew pieces and Chinese Leaves and stir-fry until leaves start to wilt a little
Add Spiralised Courgette, plenty of Black Pepper and a few splashes of Tamari
Keep stir-frying all the time
When everything is cooked but still has a bite to it, remove from heat, add Lentil Sprouts, stir a few times, add Avocado , a bit more Tamari and Black Pepper if desired and remove to hot plate. Add Alflalfa Sprouts.
A busy day today! Belatedly inspired to make some raw chocolate for Valentine’s Day, I devised not 1, not 2, but 3 recipes for different palates. They are very simple to make: once you’ve got the cacao butter melted and measured, it takes seconds to mix together and then all you need to do is pour and freeze.
(We use their products because they are Organic, Raw, Fair Trade and Excellent Quality. Apart from the bars and cacao butter, most of their products come in Resealable Bags and the new packaging is Recyclable too!)
This version is very dark, coconut palm sugar is not like refined sugar, it is much more subtle. You may also want to grind it a little finer so that it blends more easily.
Remember, Raw Chocolate is very rich and you won’t eat as much at once as you would if it were commercial chocolate.
Note: As always, we tend to do things by eye and taste, so measurements are inevitably approximate.
First, cover a baking tray with greaseproof paper and have some small cookie shapes ready. Heat up some water to melt the cacao butter in a small bowl in order to measure it if it’s in a block or if it’s broken up into small pieces you can put it straight into the bowl with the cacao powder and coconut palm sugar.
Ingredients
90g Raw Cacao Butter
60g Raw Cacao Powder
60g Coconut Palm Sugar
1 Tsp Vanilla Extract
Approx 3 Tbsp Finely Chopped Raw Almonds (We actually forgot to measure. Just sprinkled them on!)
Method
Melt Cacao Butter and add to Cacao Powder and Coconut Palm Sugar in a bowl over a pan of hot but not boiling water.
Stir until sugar is dissolved and everything is thoroughly mixed and smooth. Add Vanilla Extract and stir in well.
Pour into moulds on parchment-lined tray or directly onto parchment. If the latter, roll the tray around to make the chocolate spread.
Sprinkle with chopped almonds and lightly press into mixture.
Freeze until hard.
Carefully press out of moulds or break up the flat chocolate into pieces. It is best left in the freezer until required. We portion them up so we can just take out the amount we need and the chocolate doesn’t start melting while you break it up or sort out how much you want.
Vanutte Chunks
Sweet Mulberry Raw Chocolate
This second recipe is sweeter as it has raw maple syrup in, children might prefer it, although it is still dark.
As before, have some moulds ready on a parchment covered tray.
Ingredients
25mls Melted Raw Cacao Butter
15g Raw Cacao Powder
25mls Raw Maple Syrup
10g Cashew Pieces
10g Dried Mulberries, de-stalked and broken up
Method
Mix together Cacao Butter, Maple Syrup and Cacao Powder in a bowl over a pan of hot but not boiling water until well blended.
Mix in Cashews and Mulberries and pour or spoon mixture into moulds, or pour mix into moulds and add nuts and mulberries on top – this will probably give you more shapes, we did it the first way and it made the mixture very thick.
It only made about 6 small shapes that were quite thick, so adjust amounts accordingly if you have a lot of chocolatey mouths to fill!
Freeze and store as before. (They are on the right of the photo below – we tried one first!)
Sweet ‘n’ Sour Raw Chocolate Chunks
Recipe Number 3 is also sweet and as there are so many different tastes in our family we thought we would cover all bases and add some sweet and sour dried fruit as well as the nuts to this one!
My husband loves raisins but the younger family members won’t eat them so he can have that row all to himself! I love dried Golden Berries, they have a sweetly tart flavour that I can’t resist, so there’s a row of those for me. In the middle are cashew pieces and dried mulberries.
Ingredients
30mls Melted Cacao Butter
30mls Raw Maple Syrup
20g Raw Cacao Powder
Handful of Raisins
Handful Golden Berries
Handful of Cashew Pieces
Method as before, but pour onto parchment in a tray and roll around to spread it out, then sprinkle the other ingredients in rows to cover the whole area and press in lightly.
Freeze and store as before. (We were able to keep the rows separate once solid by gently using a knife in a sawing motion and then breaking them up).
With all these recipes you can add different flavours. Some like mint, orange – even chilli!
Ps Here’s a whimsical music video By Death By Chocolate. Enjoy!
I have a confession to make. You know all those kitchen gadgets I mentioned in Gadgets Anonymous ? Well… <typing in quiet voice, head down, eyes looking sheepish> I have another one… But it’s not a blender!
Nope, a spiraliser. Lurch is its name.
To be fair, it isn’t new. It’s been sitting in the cupboard for some time, still in its box, waiting for us to catch up to it. And last night, we finally did, amd what fun!
On this plate are a Red Apple, a Carrot, half a medium Courgette and a quarter of a long Cucumber. Look at the wonderful colours!
It is highly unlikely anyone would sit and eat those items whole with a knife and fork. But spiralised, it becomes a whole different experience. Spiralising really does make a difference to how they taste, the texture and how much you can eat.
I had all this for dinner last night, along with a couple of very tasty, easy-to-make items from Jason Vale’sSuper Fast Food app, which I hope to review when we’ve given it a good workout – so far, so thumbs up!
(We made the Zesty Creamy Rocket Pesto and the Nutty Seeded Crackers, both flavourful and nourishing and now added to our menu for regular use).
For the kids, it’s so much fun watching the twirly ribbons of veggie noodles emerging from the spiraliser, they just want to take a handful, tip their head back and start feeding the spirals into their mouth.
The Lurch spiraliser is very light and easy to use. Kids can help make their noodles with supervision. It comes with 3 different blades which are stored in the side and have protective hand grips to make it easy to switch.
It has suction feet to stop it slipping or travelling while in use. It also cores, and kids find the leftover middles amusing to play with or eat, or they can be juiced.
I am so excited! I know I am late to the party as far as spiralising is concerned, but I’ve been wanting to try for so long and better late than never!
Just hope the juicers and blenders aren’t going to view this as an act of betrayal! (But they needn’t worry, they continue to have pride of place on the kitchen counter, the spiraliser for the moment is still confined to the cupboard).
It’s orange with black chia seeds and it roooaaarrrs! It doesn’t really have tigers in, but it does have tiger nut milk! It’s packed with protein, Vitamin E, potassium, omega oils and lots of other goodies to help power you through your day.
Ingredients
1 Banana
Handful of Organic Sunflower Seeds
Handful of Raw Chocolate Company Goji Berries*
1 Tbsp Raw Chocolate Company Chia Seeds
1 Heaped Tbsp Organic Quinoa Flakes
1 Organic Dried Apricot
Medium Glass of Tiger Nut Milk* (see Recipes) – more or less depending on how thick or thin you like it.
Blend until smooth, and if you’re reading this in Summer, pour over ice – if not, add a pinch of turmeric and roooaaarrrr!!
(Psssst couldn’t resist posting this YouTube link to Katy Perry’s ‘Roar’!)
Warning: Cycling season is back so fun Orica-GreenEDGE YouTube video at end of recipe!
There is always a debate in our house whenever nut milk is made as to what do with the leftover pulp. It seems wasteful to just discard it and you need to have some idea of what you’re going to do with it before you make the nut milk. Having soaked the almonds for the milk last night, I was lying in bed this morning trying to devise a way to use up the pulp. I had a nice long lie-in! There are already recipes using Tiger Nut Pulp on my Raw Treats Recipes Page and here’s the one I came up with using the Almond Nut Pulp.
See, I really was working not sleeping 😉
As always, measurements are approximate, substitutions of like for like are encouraged, whatever you have in your cupboards that behaves in the same way.
All ingredients are organic and vegan.
Before you begin, line a baking tray with greaseproof paper, then break up the bar of raw chocolate into a bowl to be placed over a pan of hot water (not boiling) to melt when you’re ready to drizzle. Heat up some water in the kettle to melt the cacao butter ready to add to the food processor with the rest of the ingredients.
Ingredients
1 Cup Almond Pulp
1 Cup Mixed Dried Figs & Dried Apricots – about 2/3 figs to 1/3 apricots
1/2 Cup Mixed Seeds – we used Sesame, Pumpkin & Sunflower
1/2 Cup Melted Cacao Butter*
1 Tsp Raw Maple Syrup (Optional)
1/2 Cup Dried Mulberries*
1/2 Cup RoughlyChopped Almonds + some more finely ground to sprinkle on
1 22g Bar Pitch Dark Raw Chocolate*
Method
Place Almond Pulp, Figs, Apricots, Mixed Seeds in processor
Pulse a few times, then process a few seconds, stirring down if it sticks
Add Melted Cacao Butter and Maple Syrup and process a few seconds, again stirring down to make it all come together well
Working quickly, add Chopped Almonds and Dried Mulberries
Process a few more seconds, they need to still be rough to give a little bite.
The mixture should come together when pressed
Quickly press into tray – the cacao butter will be setting – then melt chocolate and drizzle or spread over mixture, ours had a bit of both: The part that has chocolate spread over it also has finely chopped almonds sprinkled on.
Place in the fridge for a few minutes then slice.
Makes about 12.
As the professional cycling road race season is back, here is a fun video of the guys from the Aussie Orica-Greenedge team having some fun with the kids in South Africa to ‘Uptown Funk.’ However bad your day is going, this is guaranteed to make you smile! Enjoy!
It’s been blowing a gale and raining cats and dogs, one of those days when you want to batten down the hatches and tuck into a bowl of something hot and sustaining. (Think that’s my quota of meteorological metaphors for one post! What I really wanted to say was: ‘It’s been raining for days in Pigeon Street!’ Anyone remember that?)
So, combined with the fact that I am mid dental treatment and have to be careful what I eat, soup is going to be on the menu quite a bit over the coming evenings.
This one is thick and hearty enough to have as a meal rather than a first course or soup in a mug.
Makes enough for 3-4 servings.
The main thing is to cook it on a low heat, very gently and slowly, so as to maximise the nutritional content.
As always, all veg, oil, etc are organic where possible (the sage is from our garden), carrots have skin left on, all measurements and timings approximate.
Ingredients
Pre-soak 1/2 Cup Rinsed Green Lentils to make them more easily digested, discarding the soak water before use
Splash of Olive Oil
1 Leek rinsed thoroughly and sliced into rings
3 Medium Carrots, chopped
1 1/2 Sticks of Celery with Leaves, chopped
Half a head Broccoli, chopped, including stalk
1/4 to 1/2 Cauliflower, including stalk, chopped
8-10 Brussels Sprouts, peeled and chopped
Dried Sage + Black Pepper
Optional: 1 Dsp Nut Butter
1 Vegetable Stock Cube + 1 Tsp Yeast Extract and Squirt of Tomato Puree dissolved in approx 600 – 700mls hot water, then cooled a little
Method
Slowly heat oil in large saucepan, don’t let it overheat
Gradually add vegetables, stirring and moving about as you add each handful.
With the lid on, and on a very low heat, gently sweat the vegetables for about 15-20 minutes, stirring occasionally
Add Sage + Black Pepper + Nut Butter, if using
Add the water, enough to just cover the vegetables
Add Lentils
Stir well.
Replace lid and on lowest heat leave to cook for about an hour or until vegetables and lentils are tender.
Do Not Boil!
When ready, allow to cool a little before blending just enough to thicken the soup but leaving chunks of vegetables for colour and bite.
Test seasoning.
I haven’t included any salt because the stock cube, yeast extract and tomato puree all contain salt. If salt is required at the table, Pink Himalayan Salt is recommended as it retains most of the minerals lost in the processing of normal table salt and no added nasties.
This Shake features some of my favourite nutrient-packed fruit: Peruvian Golden Berries and Blueberries.
Golden Berries are regarded by some as one of the Superfoods, being nutritionally dense, and with their sweetly tart flavour they are delicious on their own as a snack, in your breakfast bowl or smoothie. (There is also a recipe for GoGo Berry Fudge on my Raw Treats Recipes page using both Golden and Goji Berries).
Also known as Physalis peruviana, Inca Berry and Cape Gooseberry, Golden Berries are comparatively high in antioxidants, fibre and iron – reportedly, they contain more iron than spinach – as well as protein and Vitamin A, whilst being lower in sugar than other berries.
They contain essential fatty acids that aid in insulin sensitivity and Dr Oz believes Golden Berries also aid in burning fat.*
So here is a recipe for a delicious and nutritious protein-rich thick shake using The Raw Chocolate Company* raw, organic Golden Berries (as I write they are still in the sale). A spoon will be required!
Golden Cacao Shake
(All ingredients are organic where possible, measurements as always approximate).
Ingredients
1 Small Ripe Banana
Handful Blueberries
2 Tbsps Raw Organic Golden Berries*
1 Tbsp Sunflower Seeds
2 Tbsps Gluten-Free Oats
Juice of 2 Apples
2 Tbsps Yogurt of your choice
2 Tbsps Raw Hemp Seeds*
1/2 Tbsp Raw Organic Cacao Powder*
Blend, Sip from a spoon, and be like the funky Jill Scott: Live Your Life Like It’s ‘Golden!’
A spicy, satisfying and nourishing soup to warm your cockles – and everywhere else!
This is my favourite when it’s cold and dark and I’m hungry but don’t know what to have and there isn’t much in the fridge anyway – you know, that day before shopping day?
Serves 2
It takes about an hour from start to finish.
Ingredients
(All veg, oil and spices are organic, so the peel is left on the carrots and sweet potatoes, if not scrub and peel. All measurements approximate.)
1 Tsp Raw Virgin Coconut Oil
1 Tsp Cumin Seeds
1 Large Onion, sliced thinly
1 Large or 2-3 Small Cloves Garlic, crushed
2 Medium to Large Carrots, scrubbed and sliced
2 Medium to Large Sweet Potatoes, scrubbed and sliced
Half Stick of Celery, scrubbed and sliced
1/3 Cup Orange Lentils, rinsed
1 Vegetable Stock Cube dissolved in approx 600 mls boiling water
Freshly Ground Black Pepper
Couple of Splashes Tamari (dark gluten-free soy sauce, a staple in our kitchen)
Fresh Coriander to serve – optional
Method
Melt the oil
Gently toast Cumin Seeds, stirring around so they don’t burn
Ditto Garlic and Onions
Add rest of Vegetables, stir a few times, then add some black pepper
Cover and allow to sweat gently for about 15 mins. stirring once.
Add Lentils, Stock Cube & Water, Tamari.
(Be sure to have enough stock to easily cover the veg as the lentils will soak up some of it)
DON’T BOIL
Simmer very gently on a low heat for about 30 mins. until lentils cooked and vegetables are soft.
Blend as little or as much as you like – We use a stick blender as we like to leave some whole, but the liquid quite thick
Taste and add more pepper if desired.
You’ll notice there is No Salt on the list. This is because the Stock Cube and Tamari already have it in and the soup can be a little salty if you put extra in. Add it at the table once you’ve tasted if need be. (Pink Himalayan is best as it still contains all the minerals and has no added nasties).
It’s Sunday evening and I have just had my final meal on a plate (as opposed to meal in a glass) before beginning Jason Vale’s Big January Juice Challenge tomorrow.*
I’ve been tapering down all week after the – for me – slight excesses of the Christmas/New Year period. I was still basically clean-eating and had at least 1 juice a day, but I did have vegan mince pies, a glass of vegan sparkling wine and larger portions more often than normal. I managed to put on 3lbs! I think it was my son’s heavenly gift of raw chocolate avocado mousse that did it – I couldn’t bring myself to share it and had it for breakfast, afternoon snack and dessert! Or maybe I am just in denial about what I actually did eat all the other times!
Anyway, I enjoyed our family Christmas and that mattered more to me than 3 extra pounds.
I have been eating normally again this last week and have already waved goodbye to half of them.
However, this is not about putting on weight and having to lose it again. Quite the opposite in fact. Other than the extra I acquired over Christmas, I don’t want or need to lose weight.
I am doing the SuperJuice Challenge of 14 days’ juicing to reset my body, boost my immune system, balance my hormones, help reduce the usual January blues I suffer and generally give my body an energy lift.
Before I began juicing, every January would signal the oncoming of the most lengthy, debilitating cough, cold and sinusitis and often a cracked rib and strained muscle from the effort of it all. Last year, as last woman standing in our family – my daughter was struck with pneumonia, my husband forced to spend several days in bed for the first time in his life and everyone else coughing and spluttering and feeling at Death’s door – I did finally succumb, but it was much less severe and shorter than normal. Plus, I didn’t have to use an inhaler.
This year, once again everyone else in the family has been snuffling and coughing, but so far I am immune. I will be interested to see if SuperJuicing will help me avoid it altogether this year.
It is not an ideal experiment: I am having dental work done twice within this period, which will place my body under some stress, but we’ll see what happens.
Note to self: Do Not Make The Same Rookie Mistake As When You First Did A Juice Challenge! (See earlier post J is For January, Juicing and Jason! http://wp.me/p6UDky-2X)
KEEP HYDRATED
UPDATE: By 3/3/16 I have managed to resist all attempts by rampant viruses to take hold! I have felt a dry throat once and a few sneezes once but each time I drank a lot of ginger and lemon tea as well as regular ginger juices – see Juicy Winter Warmers in Juice Recipes – and within hours they were gone. This despite being hugged and kissed by younger family members in the full throws of colds and chest infections as well as having some intensive dendtal treatment and falling on the stairs!
How to cook "with visual instructions" "using familiar ingredients from your local grocery stores" healthy, traditional and delicious Japanese dishes!!


You must be logged in to post a comment.